
Disclosure: This post includes affiliate links. If you purchase through my Bluehost link, I may earn a commission at no extra cost to you.
Updated November 3, 2026.
Start a blog with a plan you can actually follow
You do not need a perfect brand or a pile of expensive tools to begin. You need a useful topic, a place to publish, and a manageable next step. This guide walks you through choosing hosting, checking the real cost, and getting into WordPress.
I am Taylor. I originally started my blog through Bluehost, and blogging has created meaningful opportunities for my family. Those past results are my experience, not a guarantee of income for a new blogger. Building an audience and earning money take time and experimentation.
Free help for your first steps
My free six-day blogging course covers setup, design, writing, monetization, launch, and what to do next. You can read the lessons at your own pace. You do not need to buy a product to use them.
New hosting signups do not include ongoing personal coaching or live calls. If you previously qualified for a coaching offer, the terms of that original offer still apply.
1. Choose who you want to help
Start with one reader and a topic you can write about consistently. List three questions that reader asks. You can refine your focus as you learn; you do not have to solve your entire business model today.
2. Choose a name and budget
Look for a short, easy-to-spell name that leaves room to grow. Check domain availability and avoid confusing similarities to other brands. If you are still deciding, some hosting signup flows let you choose your domain later.
Hosting, domain registration, and renewals are real costs. Compare the full amount due today, the renewal price, and the length of the commitment. A monthly advertised rate often represents a prepaid annual or multiyear plan.
3. Set up hosting and WordPress
If Bluehost fits your needs, open the current Bluehost offer through my affiliate link. Read the current features and prices before you buy. The public signup screens below were reviewed November 3, 2026; prices and labels may change.
1. Choose a plan and billing term
Open the current Bluehost offer and compare the entry-level WordPress hosting plan with the other options. In the checkout reviewed for this update, the entry plan was called Starter. Check the number of sites and included features instead of relying on an old plan name.
A lower monthly equivalent can require a larger upfront payment. Compare the full first-term total and the renewal total, then choose a term you can comfortably afford.
2. Choose or connect your domain
You can search for a new domain, use one you already own, or choose a domain later when that option is offered. Review the domain extension, registration term, first-year offer, and renewal cost. A free first year does not mean a free domain forever.
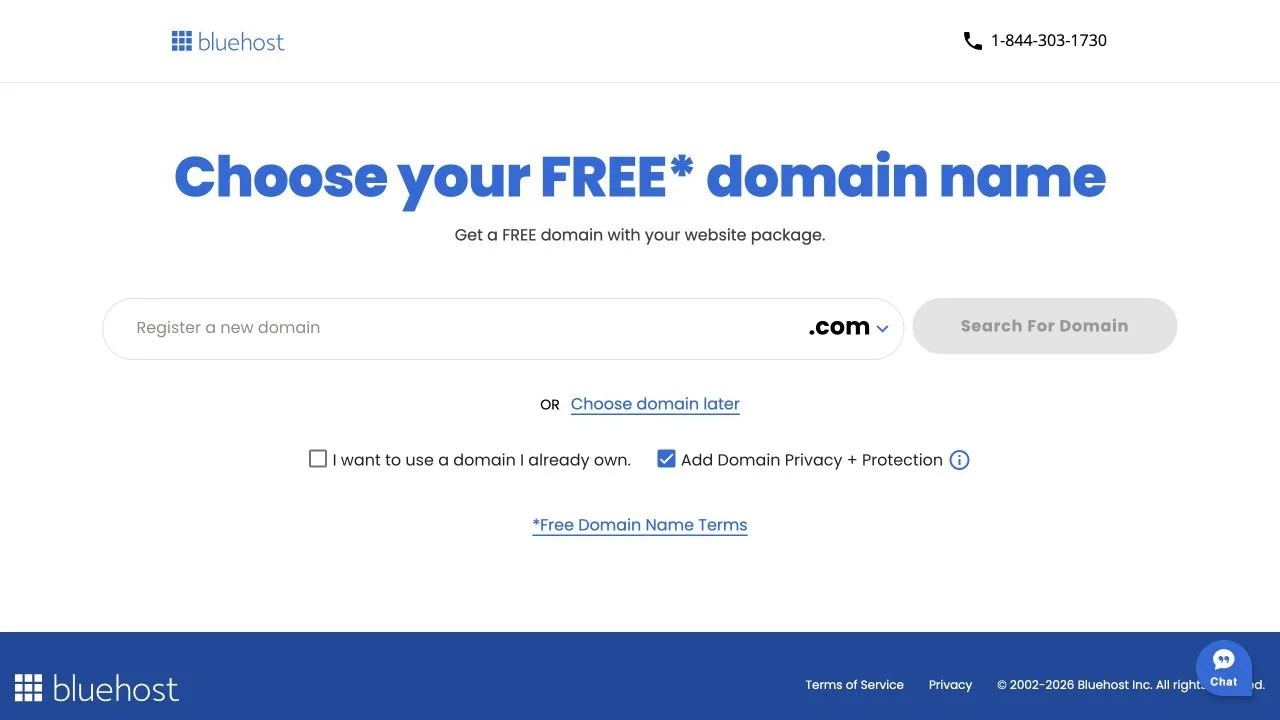
If you already own your domain, follow Bluehost’s connection instructions after purchase. You do not need to buy the same domain again. Domain privacy may be offered separately; read what is included and its renewal price before choosing it.
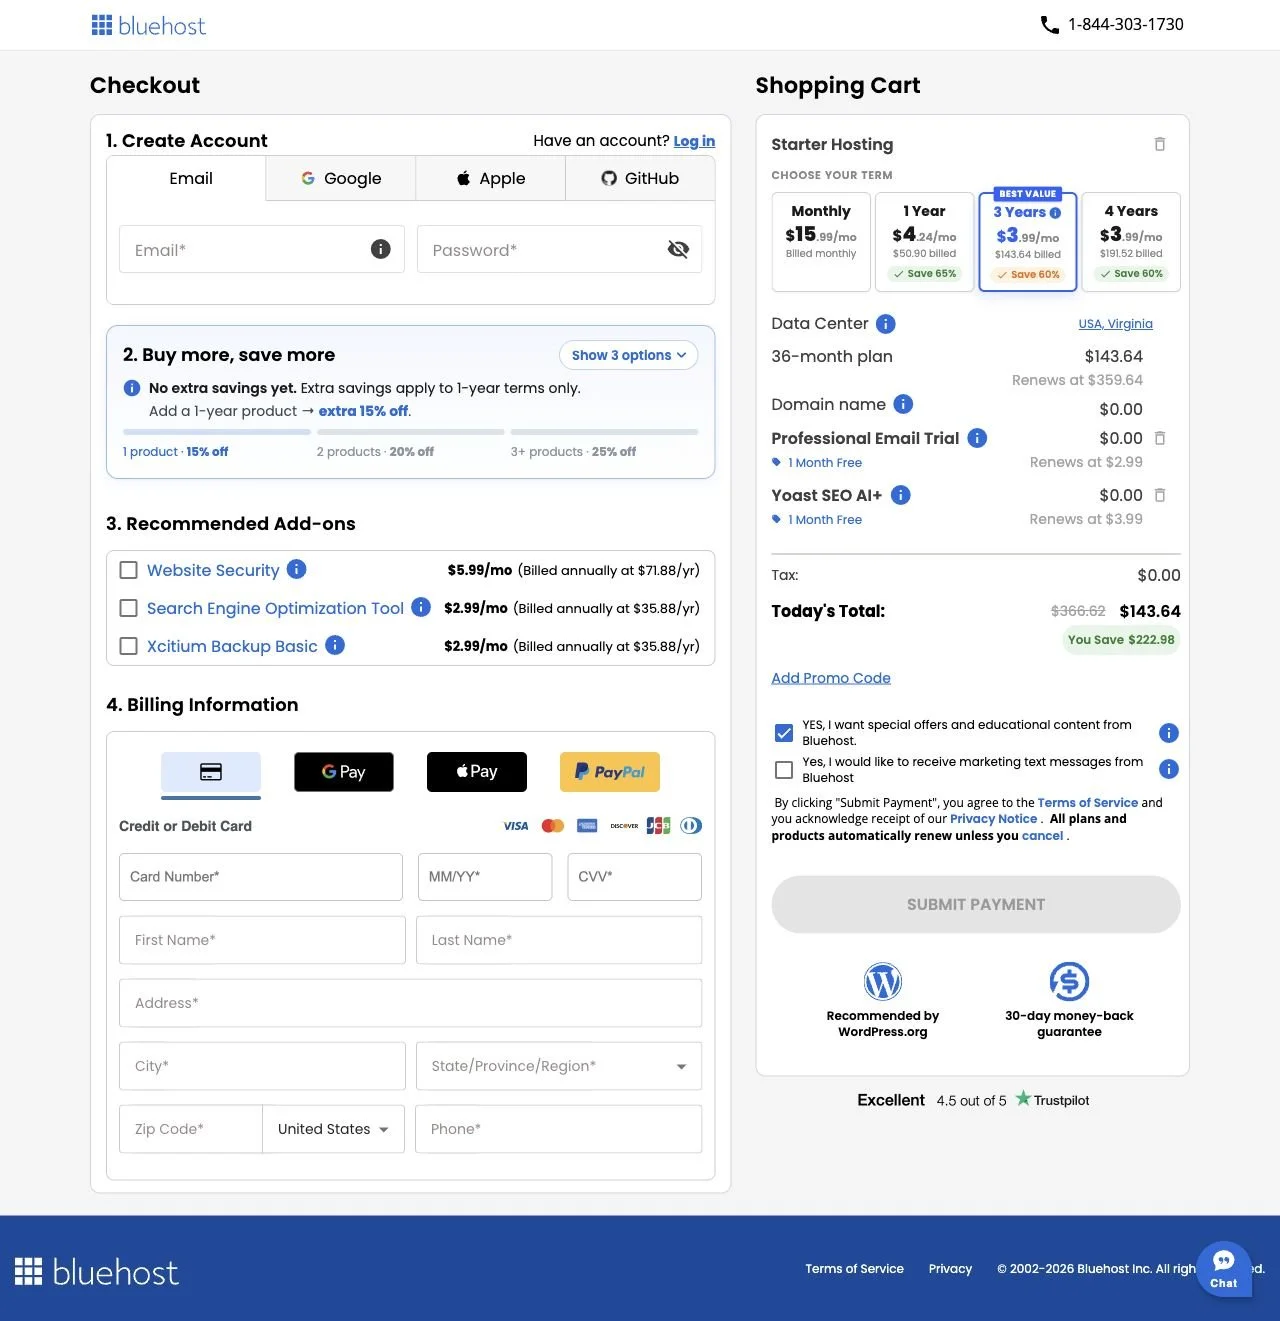
3. Review the cart carefully
Check the hosting term, total due now, renewal price, domain charges, tax, and every selected extra. Security, SEO, backup, and email products may be offered separately. A free trial can become a paid renewal, so read the terms before accepting it. Remove extras you do not want.
Use an email address you can access for account recovery. Save the receipt and renewal details. Complete payment only when the full total and terms make sense for you.
4. Open WordPress
After purchase, follow the welcome email to sign into your Bluehost account. The logged-in screens can vary by account and plan. The guidance here is based on Bluehost’s documentation, not a newly purchased test account.
In the Bluehost portal, look for your site under Websites and use its WordPress access option. If WordPress has not been installed yet, follow Bluehost’s current WordPress installation guide. You may be able to work on a temporary domain while your own domain is being connected.
Keep your login details private. If the dashboard differs from this lesson, use Bluehost’s support for account or installation issues instead of buying another plan.
Take a moment to find your way around
WordPress is where you will create posts and pages and adjust your design. Bluehost is where you manage hosting, billing, and domains. They are connected, but they serve different purposes.
Next, visit Day Two: choosing a theme and setting up your design. Work on a draft before publishing. You do not need paid design tools or a finished logo to write your first helpful post.
Keep going with the free course
Choose the lesson you need next:
You can use all six lessons without purchasing the toolkit.
Want a workbook for your plan?
The optional Launch Your Blog Toolkit brings blog-name worksheets, post planners, and setup checklists into one 23-page PDF. It is $37, one payment, with automatic download delivery. See actual page previews before deciding.
Whether you use the workbook or a notebook, start with one useful post and a repeatable work session. You can improve the design as you go.
