
Disclosure: This post includes affiliate links. If you buy through my Bluehost link, I may earn a commission at no extra cost to you.
Hosting details checked November 3, 2026.
What if that blog you keep thinking about became something real?
Maybe you want a creative outlet that is yours. Maybe you want to build something around the things you love, help with the bills, or have more flexibility for your family. Or maybe you keep saving “how to start a blog” pins and thinking, I would love to do that… but where would I even start?
Hey there, I’m Taylor. I know that feeling because I was that person.
I didn’t start with a business background, a beautiful website, or a clue how bloggers actually made money. I started because I wanted something different for my life. Blogging became a big part of that change, and I want to help you take your first step, too.
Below, I’ll share my story and walk you through the hosting signup. For what comes after that, the design, the posts, the money-making possibilities, and getting ready to launch, join my free six-day email course. One lesson at a time, right in your inbox, so you don’t have to figure everything out today.
How this whole blogging thing started
Shortly after marrying my husband, we were poor newlyweds. I’m talking food-stamps poor. We couldn’t afford date nights or a stop at Starbucks, and we didn’t get to go on a honeymoon.
I was in nursing school and working as much as I could. I hated my job, and I had realized I didn’t want to be a nurse. It felt like my whole life was falling apart because I thought I was stuck on a path I didn’t want.
Eventually, I realized I couldn’t keep living for the weekends and hoping things would somehow change.
So I started searching Pinterest and Google for ways to make money from home. I wanted to travel, pay down debt, save for a house, and eventually have a baby. I wanted to be able to picture a future I was excited about.
I tried other ideas. And I kid you not: after months of trying, I had made about $9.
Great… that might buy a Starbucks coffee and a chocolate cake pop. It wasn’t exactly the work-from-home life I had been imagining, lol.
Then I started seeing bloggers share what they were building. I decided to give blogging a try. Back then, my initial hosting purchase was around $70. That was real money to us, and I remember wondering whether I would ever earn it back.
And no, it did not magically work the next morning.
I thought I would start a blog and suddenly know what to do. Instead, I couldn’t figure out how to make it look good, how bloggers made money, or even how to write a good blog post.
I got so frustrated with posts about how much money people were making when I still needed someone to explain the next actual step.
During that frustration, I made myself a promise: if I figured this out, I would help other people who were starting where I was.
In my own journey, by month seven I had replaced my job income and left my job. By month fourteen, my husband left his job to work on the blog with me.
Blogging took work, learning, and plenty of figuring things out.
But it opened possibilities for our family that I couldn’t see when I was stuck in nursing school. That is why I still care so much about helping someone take that first step.
I didn’t begin because I was already good at blogging. I got better because I began.
I made you the help I wish I had.
My free six-day email course breaks the beginning into manageable steps. You’ll have a lesson to come back to when you sit down at your computer, instead of another collection of tabs you never quite get through.
You don’t need to buy hosting or my toolkit to join. Start with the free lessons, get your bearings, and decide what makes sense for you. I’m excited for you to see what you can create.
You don’t have to have your whole future figured out
When I started, I wrote about style and affordable designer dupes. Later I wrote about food, travel, and saving money. My blog grew and changed with me.
So if choosing a “perfect niche” has kept you stuck, take a breath. Start with something you enjoy talking about and a person you would love to help. You can get more focused as you learn what your readers need.
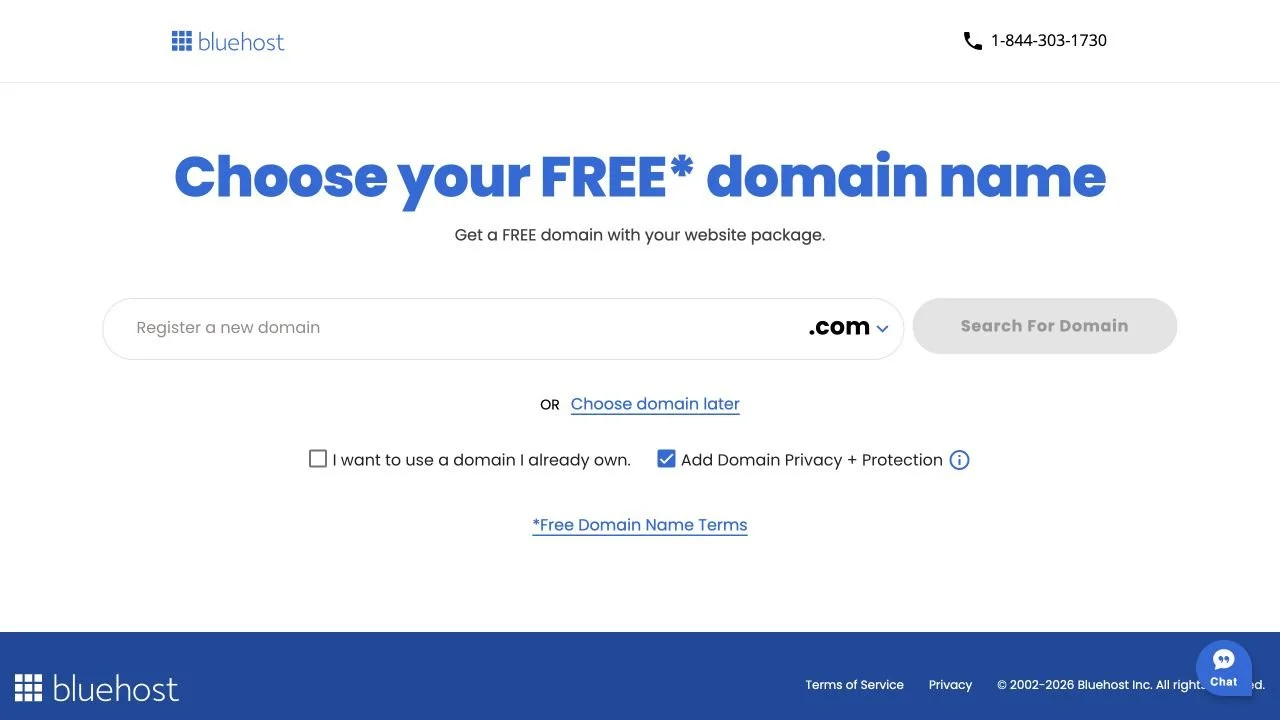
And your blog’s name doesn’t have to be a masterpiece, either. My first blog was called Smart and Simplistic. Eventually, I changed that my own name. Choose something easy to spell that gives you room to grow. That’s enough for a first step. Or as your going through the Bluehost sign up process you can also click “Choose domain later” and set your name down the road after you get started. Don’t let picking the perfect domain name for your blog be the thing that holds you up from starting.
Let’s make your blog real
A laptop, an internet connection, and an email address you can access are a good place to start. If you’re reading on your phone, join the course above so you can pick this back up when you’re at your computer.
Hosting is simply the service that keeps your website online. I started my own blog with Bluehost, which is why I’m sharing its signup process here.
What does it cost today?
You can get started for $4.24 per month (That’s only $50.40 for your whole first year!). I want you excited about getting started and comfortable with what you’re spending.
You don’t need to buy a pile of premium design tools to take my free course. Choose whatever offer makes the most sense for you and your goals.
See the current Bluehost offer for my readers →
1. Choose your plan and your blog’s name
Open the offer in another tab so you can keep this guide beside it. Choose the hosting plan and term that fit your budget. The entry plan was called Starter when I checked.
Search for an available domain, connect one you already own, or use “choose later” if that option appears. Please don’t let a fancy domain price convince you that you need to spend hundreds to choose a name!
2. Keep your checkout simple
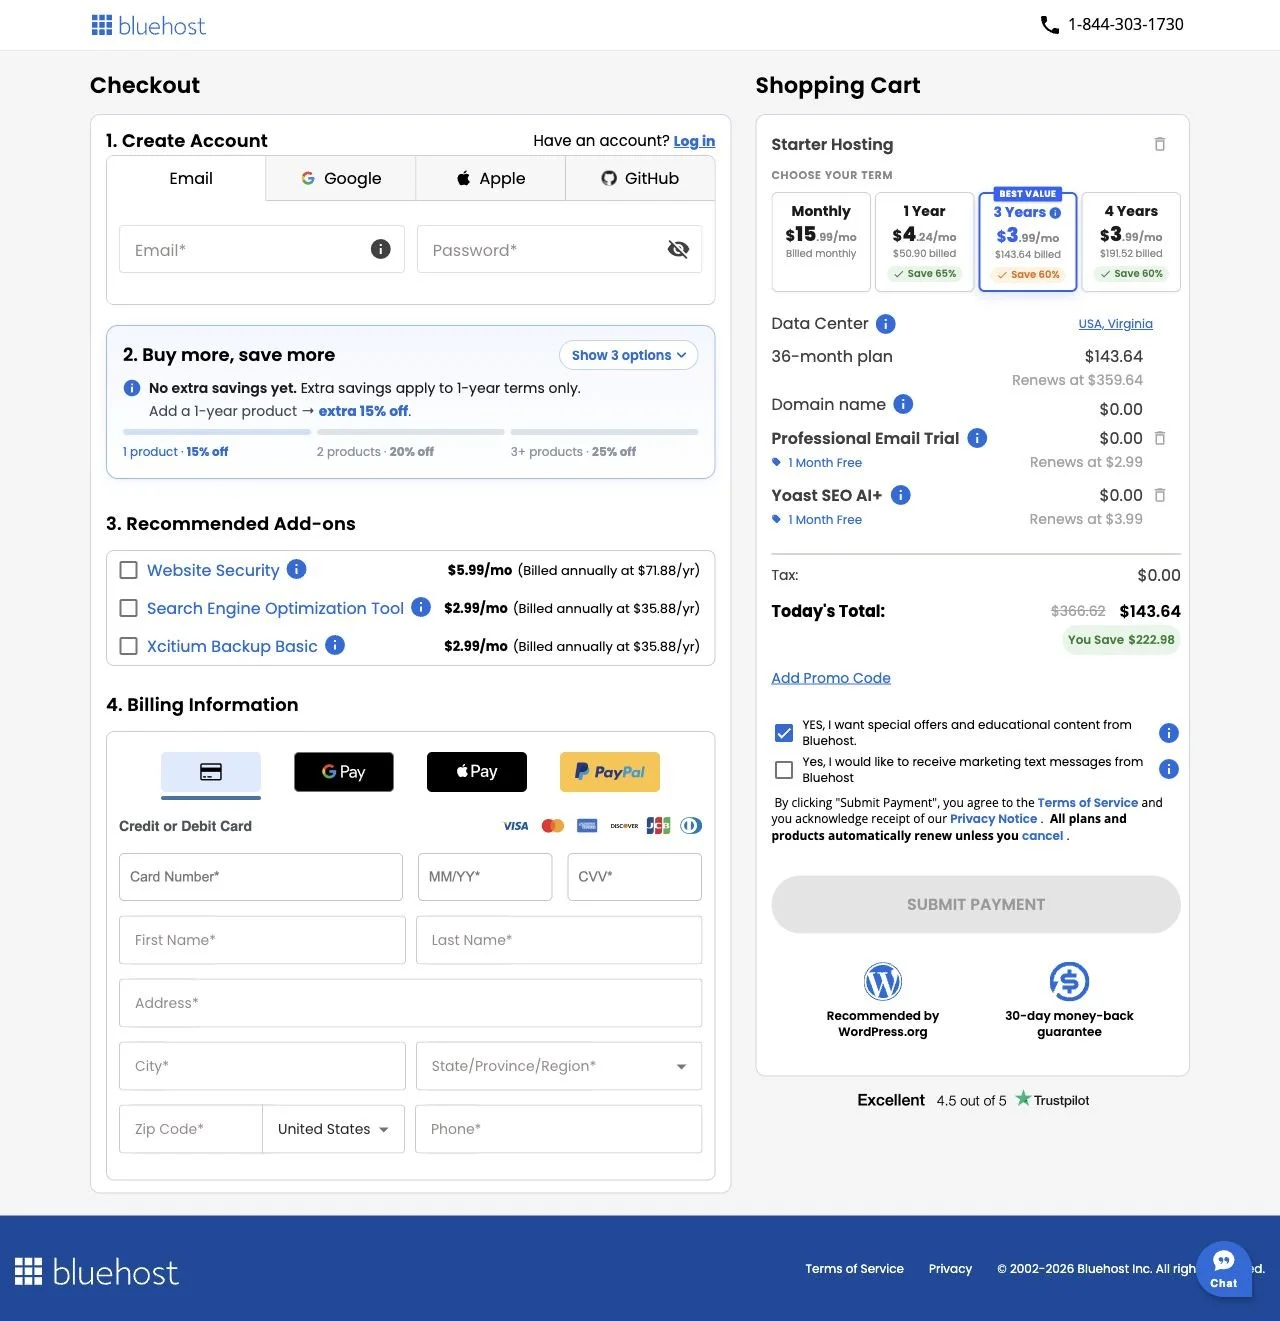
You’re buying a home for your blog, believe me when I say you do not need every upgrade on the page. Choose the term you want, then review the hosting total, domain offer, and any extras. Remove the extras you don’t want.
3. Check the total, then take your first step
Before paying, confirm the you are using an email address you can access, and save your receipt and login details.
Once your purchase is complete, follow Bluehost’s welcome instructions to open your account and set up WordPress. If your dashboard looks different, Bluehost’s current installation guide and account support can help.
And then? Take a second to let it sink in. The blog you’ve been thinking about has a place to live. You don’t have to have a perfect logo, a polished homepage, or a hundred post ideas today. You’ve taken a real step.
Now let’s turn “I started a blog” into “I know what to do next.”
Getting hosting is just the beginning. This is where my free six-day blogging email course comes in. I’ll walk you through:
Day 1: Your blog’s name, hosting, and getting into WordPress.
Day 2: Making your blog feel like you, without getting lost in design decisions.
Day 3: Setting up pages and navigation so readers can find their way around.
Day 4: Writing helpful posts and understanding how blogs can earn money.
Day 5: Getting ready to share your blog with the world.
Day 6: Choosing your next steps so you can keep going without doing everything at once.
The lessons come to your inbox so you can return to them when you’re ready. You can work at your own pace. Join below, and let’s make your next step a little easier.
More of a pen-and-paper person? I made something for you, too.
If your ideas are scattered between notes on your phone and things you meant to remember, the Launch Your Blog Toolkit gives you one place to turn them into a plan.
Inside the 23-page PDF are blog-name worksheets, reader and content planning pages, headline prompts, a reusable post outline, a monetization planner, and a setup checklist. You can see real pages before you buy.
It’s $37, one payment, with an immediate download after checkout. It’s a workbook you can print and annotate.
I built it because It’s the resources I would have wanted when I started. I love a tangible to do list, and writing things out in my planner.
Take a peek inside the toolkit →
The course is still free, and a notebook works, too. What I want most is for you to stop feeling like you need everything figured out before you’re allowed to begin.
Thanks for spending part of your day here with me. I remember being on the other side of a post like this, wondering if I could really do it. You’re allowed to learn as you go. You’ve got this.
— Taylor
